How to detect an AR Marker with ARKit 1.0 on Unity (Legacy Method using OpenCV)
EDIT: This tutorial is actually obsolete, if you need to do this thing please refer to this guide.
In this tutorial I will show you how to recognize an AR Marker in Unity using the Apple ArKit library, if your question is: why I should need that? my answer will be: because for now this is the only way to have an absolute space using this library, in the future this thing is gonna change, there are rumors that this feature is gonna be integrated in the next releases.
But if you want to do it now, you are in the right place, in first place i need to tell you that not all the tools that i'm gonna use are free, for doing this i'm gonna use an open-source library called OpenCV, that is actually free, but by default is not directly compatible with Unity, or better, you have to lose some time to make it works inside the Unity ecosystem; for this tutorial I used a plugin called OpenCV for Unity, that is not free but saved me a lot of time. ps(there are others cheaper plugins that does the same thing, this is the oldest one and I bought this long time ago for another project, you can try using another one but the procedure is not gonna be exactly the same).
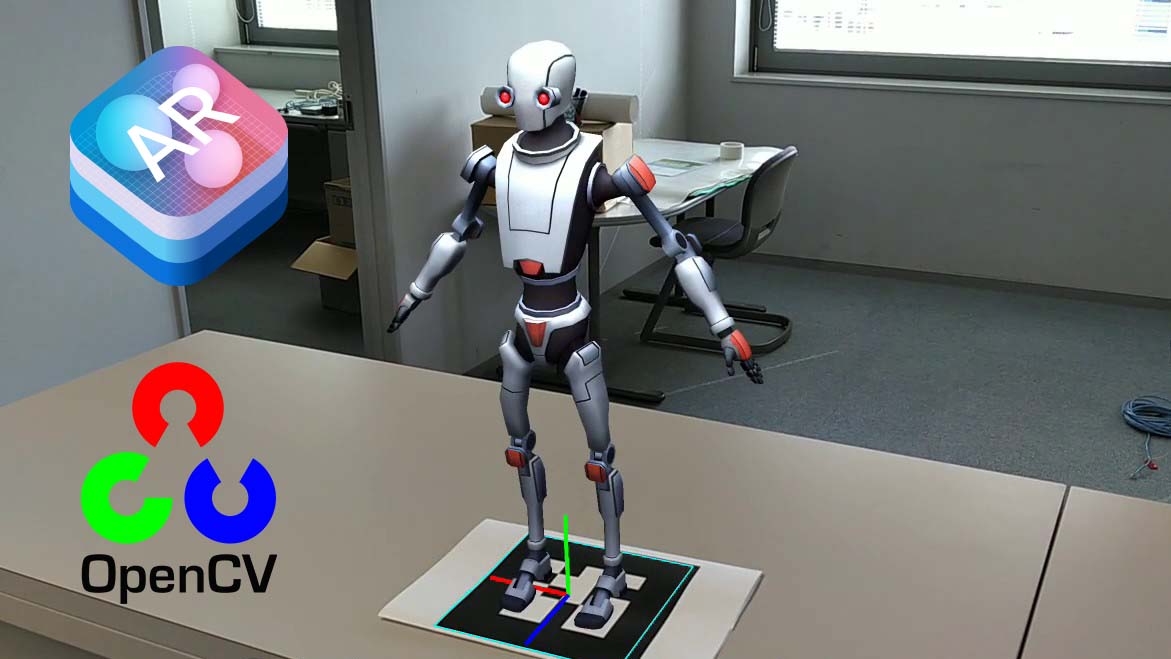
Here you have a preview of the result:
This can enable to you the possibility to create multiplayer AR Games, or simply track the environment starting from an absolute location, that is cool enough.
So let's start:
First of all you have to import this 2 plugins in a empty IOS Unity project (You can also switch it later, but it gonna waste a lot of time reimporting all the assets).
You probably gonna have some compiler errors due to a function of OpenCV for Unity that has the same name of another function inside the ARKit Library, you have to find that function and rename it, if you are using Visual Studio you can use his rename tool to auto-reconnect all references, if it's not, you need to look for all references and change the name of the function into them, you can also mantain the same function name, but specify on all the references the Class they reference to.
Example:function.property = variable;
becomes:class.function.property = variable;
Then I imported also a useful marker detection toolset from the same developer of OpenCV for Unity, you can find this at this link.
After you did this you are ready to work on the real thing.
Let's start opening an example scene from ARKit Library, In this tutorial i'm gonna work with the "SceneNameGoesHere", but no matter which you are gonna choose.
Then, a bit of theory, with OpenCV we have to analyze an image, understand the perspective, look for markers and if we find them, place a Gameobject.
Spoiler, we are gonna have some problems during this project, the first one is that ARKit gives back it's camera stream using the YCbCr format, that we can't analyze directly with OpenCV, the easiest way to convert this stream, is extrapolate a RenderTexture from the Unity Camera, and analyze the image produced from that, this in an efficient way to do this because you leave the conversion to the GPU, executed automatically using the "ARCameraShader.shader" that is inside the defaults ARKit library assets.
The second problem is analyze an image stream that can change the resolution, I mean that when you are using your device in Portrait Mode you have "most of the times" a 9:16 ratio, but when you are in Landscape Mode you have a 16:9 ratio, this can cause problems, and make our scripts more complex to manage this exception, in this tutorial we are cover the easy way, so we lock our application in Portrait Mode using the PlayerSettings/Resolution and Presentation/Orientation menu.
Now the project is completely set up, let's start working on the scene and the scripts.
First of all, you have to parent a new camera to the main camera that is child of the CameraParent.
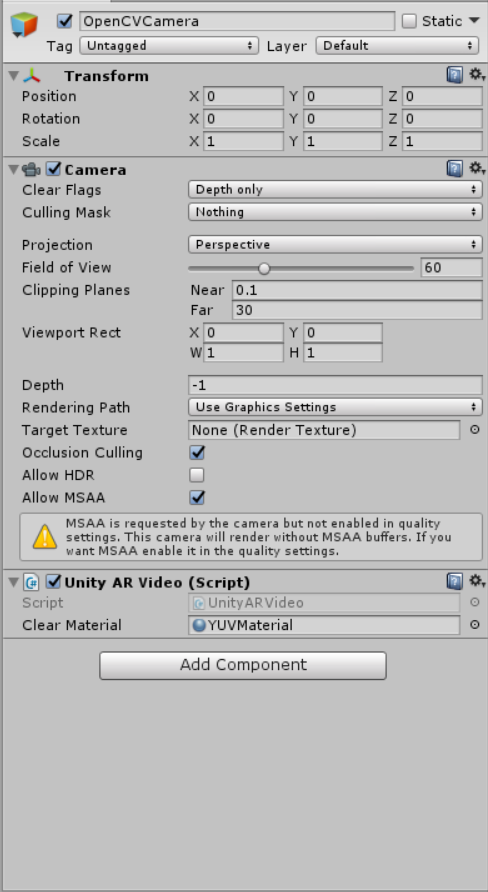
Let's call it OpenCVCamera, now reset the position, rotation and scale of this new camera, then copy all the properties of the father camera component and apply them to the OpenCVCamera.
After that you have to set the Culling Mask of this camera to Nothing and add to it the UnityARVideo component and assign to it the YUVMaterials (this two are parts of the ArKit package, you can find them searching their name inside the project bar).


Perfect, now the camera needed for OpenCV it's almost ready.
We simply need to add a simple script that synchronizes it's FOV to the one from the father camera, (the problem is that the arkit libraries will change that during the initialization, and our child camera must be synchronized to that.
A simple example of the script could be something like this:
using System.Collections;
using System.Collections.Generic;
using UnityEngine;
[RequireComponent(typeof(Camera))]
public class CameraSync : MonoBehaviour {
public Camera FatherCamera;
public Camera MyCamera;
// Update is called once per frame
void Update () {
if (MyCamera.fieldOfView != FatherCamera.fieldOfView)
{
MyCamera.fieldOfView = FatherCamera.fieldOfView;
}
}
}
Ok now it's finally the time of the marker detection script.
First of all create a new C# script and import this 2 libraries:
using OpenCVForUnity;
using OpenCVMarkerBasedAR;
After that we have to declare some variables, that we are gonna need later:
public RenderTexture CameraStream;
public Camera ARCamera;
public MarkerSettings[] markerSettings;
public float MarkerWorldScale = 0.29f;
Texture2D ConvertedCameraStream;
Then we have to declare this method useful for the conversion from the RenderTexture to a Texture2D, that we are gonna need later:
Texture2D toTexture2D(RenderTexture rTex)
{
Texture2D tex = new Texture2D(1080, 1920, TextureFormat.RGB24, false);
RenderTexture.active = rTex;
tex.ReadPixels(new UnityEngine.Rect(0, 0, rTex.width, rTex.height), 0, 0);
tex.Apply();
return tex;
}
Ok now create the method that is going to be the core of our system, you can name it whatever you want, we don't need any arguments and it doesnt need to return anything.
Let's start with the image analysis initialization part, this is a piece of code that I stole from the OpenCV Marker Based Examples:
print("Marker Detection Start");
ConvertedCameraStream = toTexture2D(CameraStream);
gameObject.transform.localScale = new Vector3(ConvertedCameraStream.width, ConvertedCameraStream.height, 1);
Debug.Log("Screen.width " + Screen.width + " Screen.height " + Screen.height + " Screen.orientation " + Screen.orientation);
Mat imgMat = new Mat(ConvertedCameraStream.height, ConvertedCameraStream.width, CvType.CV_8UC4);
OpenCVForUnity.Utils.texture2DToMat(ConvertedCameraStream, imgMat);
Debug.Log("imgMat dst ToString " + imgMat.ToString());
float width = imgMat.width();
float height = imgMat.height();
float imageSizeScale = 1.0f;
float widthScale = (float)Screen.width / width;
float heightScale = (float)Screen.height / height;
if (widthScale < heightScale) { imageSizeScale = (float)Screen.height / (float)Screen.width; } else { // Useful if you want to unlock the Landscape mode } //set Camera Parameters int max_d = (int)Mathf.Max(width, height); double fx = max_d; double fy = max_d; double cx = width / 2.0f; double cy = height / 2.0f; Mat camMatrix = new Mat(3, 3, CvType.CV_64FC1); camMatrix.put(0, 0, fx); camMatrix.put(0, 1, 0); camMatrix.put(0, 2, cx); camMatrix.put(1, 0, 0); camMatrix.put(1, 1, fy); camMatrix.put(1, 2, cy); camMatrix.put(2, 0, 0); camMatrix.put(2, 1, 0); camMatrix.put(2, 2, 1.0f); Debug.Log("camMatrix " + camMatrix.dump()); MatOfDouble distCoeffs = new MatOfDouble(0, 0, 0, 0); Debug.Log("distCoeffs " + distCoeffs.dump()); //calibration camera Size imageSize = new Size(width * imageSizeScale, height * imageSizeScale); double apertureWidth = 0; double apertureHeight = 0; double[] fovx = new double[1]; double[] fovy = new double[1]; double[] focalLength = new double[1]; Point principalPoint = new Point(0, 0); double[] aspectratio = new double[1]; Calib3d.calibrationMatrixValues(camMatrix, imageSize, apertureWidth, apertureHeight, fovx, fovy, focalLength, principalPoint, aspectratio); Debug.Log("imageSize " + imageSize.ToString()); Debug.Log("apertureWidth " + apertureWidth); Debug.Log("apertureHeight " + apertureHeight); Debug.Log("fovx " + fovx[0]); Debug.Log("fovy " + fovy[0]); Debug.Log("focalLength " + focalLength[0]); Debug.Log("principalPoint " + principalPoint.ToString()); Debug.Log("aspectratio " + aspectratio[0]); //To convert the difference of the FOV value of the OpenCV and Unity. double fovXScale = (2.0 * Mathf.Atan((float)(imageSize.width / (2.0 * fx)))) / (Mathf.Atan2((float)cx, (float)fx) + Mathf.Atan2((float)(imageSize.width - cx), (float)fx)); double fovYScale = (2.0 * Mathf.Atan((float)(imageSize.height / (2.0 * fy)))) / (Mathf.Atan2((float)cy, (float)fy) + Mathf.Atan2((float)(imageSize.height - cy), (float)fy));
Sorry for the mess, I really need to find a plugin for the code on this blog.
Then we have to initialize the marker database:MarkerDesign[] markerDesigns = new MarkerDesign[markerSettings.Length];
for (int i = 0; i < markerDesigns.Length; i++) { markerDesigns[i] = markerSettings[i].markerDesign; } MarkerDetector markerDetector = new MarkerDetector(camMatrix, distCoeffs, markerDesigns); markerDetector.processFrame(imgMat, 1); foreach (MarkerSettings settings in markerSettings) { settings.setAllARGameObjectsDisable(); }
After that, we look if the marker we want, was found in the image, to do that this last part of code is inside this condition:List findMarkers = markerDetector.getFindMarkers();
for (int i = 0; i < findMarkers.Count; i++) { Marker marker = findMarkers[i]; foreach (MarkerSettings settings in markerSettings) { if (marker.id == settings.getMarkerId()) {
Now if a marker matches, we need to get it's coordinates and convert them in something useful for Unity: Matrix4x4 transformationM = marker.transformation;
Debug.Log("transformationM " + transformationM.ToString());
Matrix4x4 invertYM = Matrix4x4.TRS(Vector3.zero, Quaternion.identity, new Vector3(1, -1, 1));
Debug.Log("invertYM " + invertYM.ToString());
Matrix4x4 invertZM = Matrix4x4.TRS(Vector3.zero, Quaternion.identity, new Vector3(1, 1, -1));
Debug.Log("invertZM " + invertZM.ToString());
Matrix4x4 ARM = ARCamera.transform.localToWorldMatrix * invertYM * transformationM * invertZM;
Debug.Log("ARM " + ARM.ToString());
GameObject ARGameObject = settings.getARGameObject();
Ok now the last tricky part we need to convert this into Unity transform properties, thanks to a tool inside the OpenCV Marker Detection library:
if (ARGameObject != null)
{
MarkerBasedARExample.ARUtils.SetTransformFromMatrix(ARGameObject.transform, ref ARM);
ARGameObject.SetActive(true);
}
Now the system could work, but by default OpenCV is going to scale the object to match the marker size, so the result that we have is that when we call this function we see that the object seems to be on the marker, but in reality is huge and in a galaxy far far away.
To solve this we have to adapt the OpenCV space to the ARKit space.
First of all we need to reset the scale to it's original size:ARGameObject.transform.localScale = new Vector3(1, 1, 1);
Then we have to rescale our position, using as pivot our camera:
ARGameObject.transform.position = ((ARGameObject.transform.position - ARCamera.transform.position) * MarkerWorldScale) + ARCamera.transform.position;
Perfect, now you simply need to fill the public variables and call the function in some way, and if the marker you selected is inside the camera stream, this script will place an object on it's position.
I did this tutorial very fast, because an official method for this is going to be realeased, so do this only if you really need it, if you are not in a hurry, wait for the official, free and more stable way to do this.
Enjoy!!